Welcome to “Pills of Technique”. These posts are dedicated to those who know very little about it and aim to present simple notions as briefly as possible.
Along this short post there are links to some websites where you can learn more about the topics discussed.
Images are the property of the respective websites mentioned in the post
1
In this post we will take a very simple look at how to DIY a dipole at home. In the example, a dipole for the 20-metre amateur radio band is taken as a reference.
Building a 20 Meter Ham Radio Dipole Antenna
In this post, we will go over how to build a 20 meter ham radio dipole antenna. We will cover the materials needed, the steps involved in construction, and the formulas for calculating the length of the antenna elements.
2
Materials Needed
materials needed to build a dipole antenna
- 2 pieces of aluminum tubing or copper wire (each 1/4 wavelength long)
- 1 center insulator
- 2 end insulators
- Coaxial cable
- Soldering iron and solder
- Drill
- Wire cutters
The materials you will need to build a dipole antenna are relatively simple and inexpensive. You can find most of them at your local hardware store or electronics supplier.
3
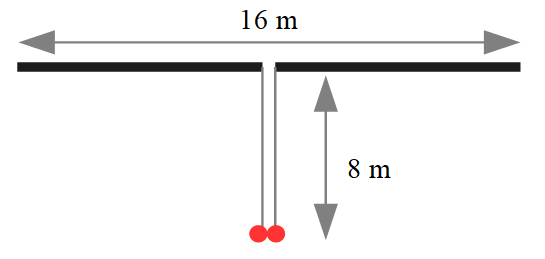
Calculating the Length of the Antenna Elements
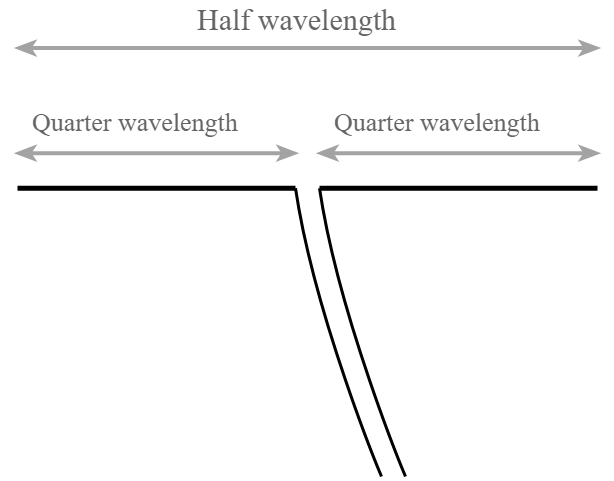
formula for calculating the length of a dipole antenna element
- The length of each antenna element is 1/4 of the wavelength of the desired frequency.
- The wavelength can be calculated using the following formula:
wavelength = (300 / frequency) * velocity factor
- Where:
- wavelength is in meters
- frequency is in MHz
- velocity factor is a value between about 0.6 and 0.95, depending on the antenna material and mounting type (straight or inverted V). A value of 0.95 is a good starting point.
- For a 20 meter antenna, the considered center frequency is 14.2 MHz.
- Plugging this value into the formula and using a velocity factor of 0.95, we get:
wavelength = (300 / 14.2) * 0.95 = 20.07 meters
- Each antenna element should therefore be 20.07 / 4 = 5.02 meters long.
The length of the antenna elements is critical for proper operation of the antenna. If the elements are too short, the antenna will resonate at a higher frequency than desired. If the elements are too long, the antenna will resonate at a lower frequency than desired.
4
Cutting the Antenna Elements
- Cut the aluminum tubing or wire to the correct length.
- Be sure to make the cuts clean and square.
When cutting the antenna elements, it is important to use a sharp saw or other cutting tool. A dull tool can cause the ends of the tubing or wire to become bent or frayed, which can affect the performance of the antenna.
5
Attaching the Center Insulator
- Slide the center insulator onto one of the antenna elements.
- Make sure the insulator is in the center of the element.
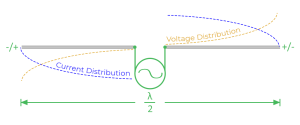
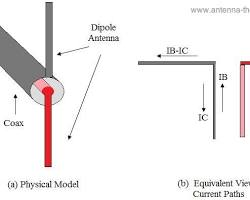
The center insulator is used to isolate the two antenna elements from each other. This is important because the two elements are operating at opposite voltages.
6
Attaching the End Insulators

end insulator attached to a dipole antenna element
- Slide the end insulators onto the ends of the antenna elements.
- Make sure the insulators are snug on the tubing or wire.
The end insulators are used to protect the antenna elements from the weather. They also help to prevent the antenna from radiating RF energy into the ground.
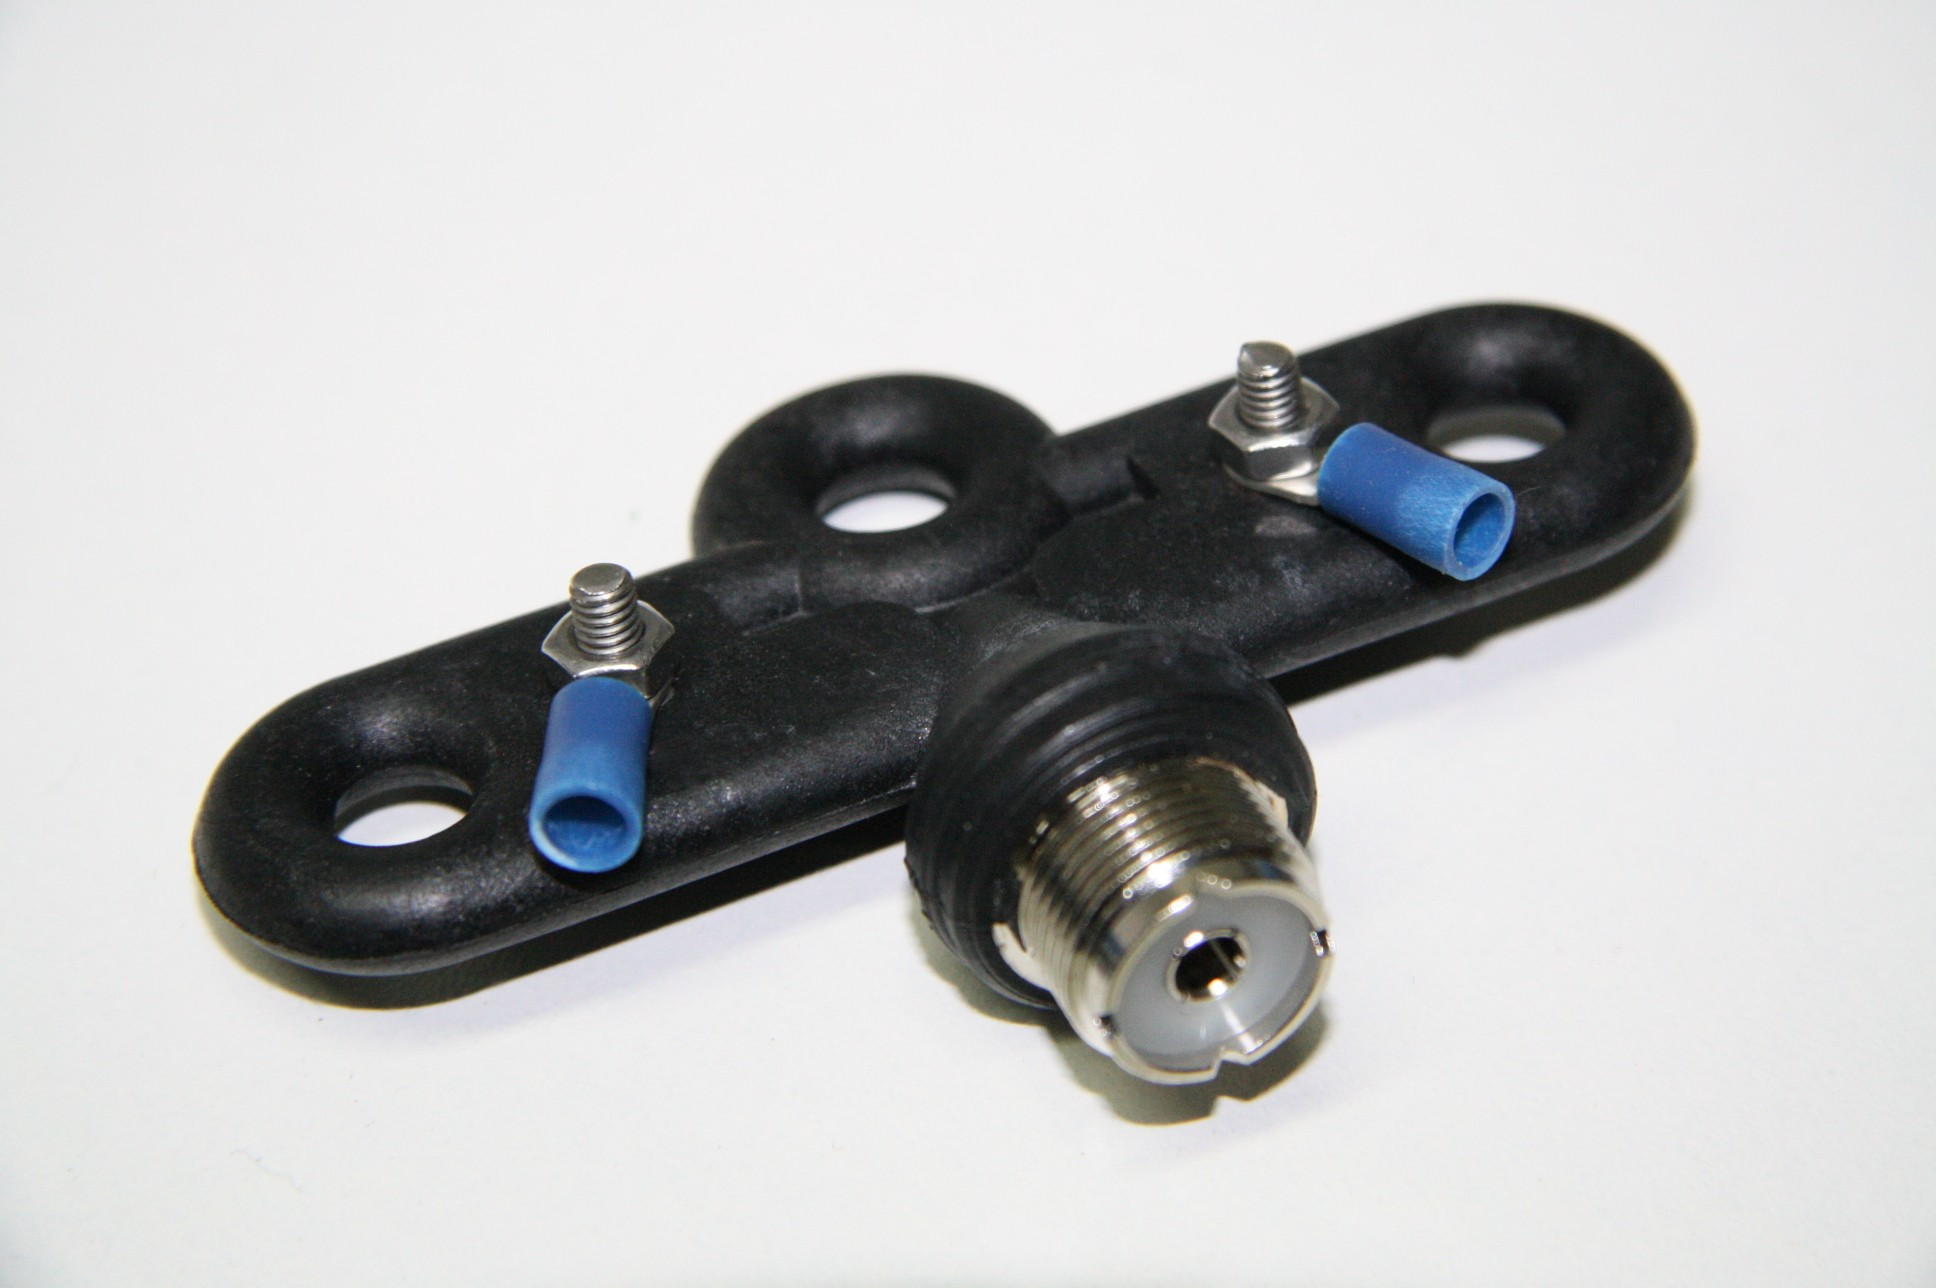
7
Connecting the Coaxial Cable
coaxial cable connected to a dipole antenna
- Strip the ends of the coaxial cable.
- Solder the center conductor of the cable to the center of the center insulator.
- Solder the shield of the cable to one of the end insulators.
The coaxial cable is used to connect the antenna to the radio. The center conductor of the cable carries the RF signal, while the shield of the cable acts as a ground.
8
Mounting the Antenna
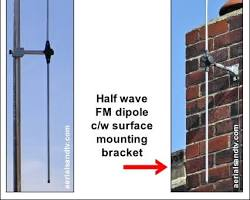
- Mount the antenna to a mast or other support structure.
- The antenna should be mounted at a height of at least 1/4 wavelength above the ground.
- The antenna should be oriented horizontally or vertically, depending on the desired radiation pattern.
The mounting location and orientation of the antenna will affect its performance. A higher antenna will have a longer range, but it can also be more susceptible to noise. A horizontally oriented antenna will radiate more signal in the horizontal direction, while a vertically oriented antenna will radiate more signal in the vertical direction.
9
Testing the Antenna
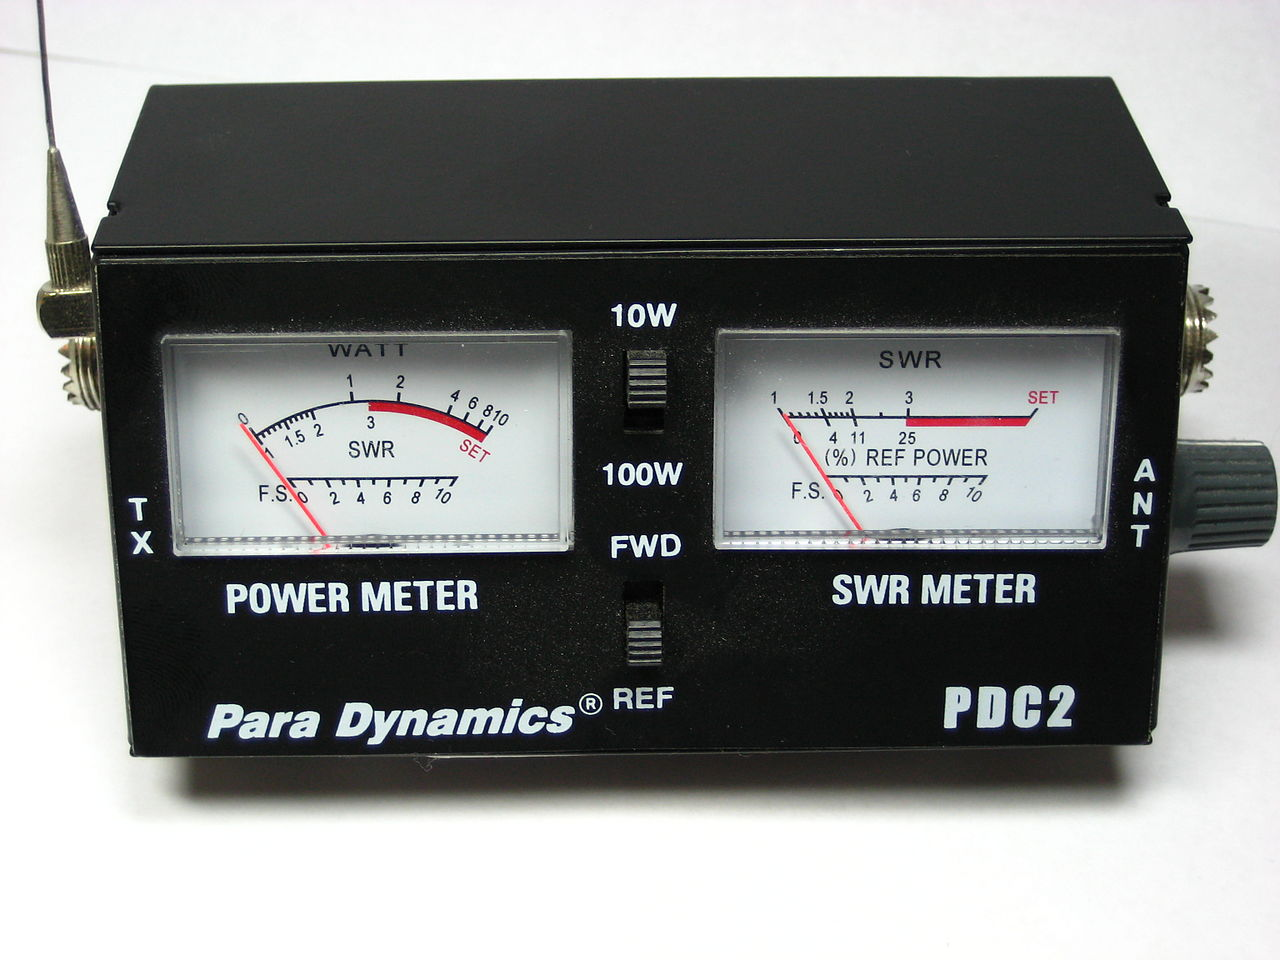
- Use an SWR meter to test the antenna.
- The SWR (Standing Wave Ratio) should be as low as possible, ideally 1:1 or less.
- A high SWR indicates that there is a mismatch between the antenna and the radio, which can reduce the antenna’s efficiency and damage the radio.
An SWR meter is a device that measures the amount of reflected power on a transmission line. A high SWR indicates that there is a mismatch between the antenna and the radio, which can reduce the antenna’s efficiency and damage the radio. It is important to test the antenna before using it to ensure that it is properly tuned.
10
Troubleshooting
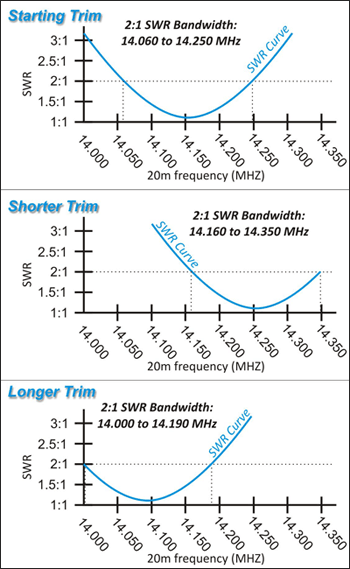
www.hamradioschool.com/post/trimming-a-dipole-antenna
- If the SWR is too high, there are a few things you can do to troubleshoot the problem:
- Check that the antenna is properly assembled.
- Make sure the antenna is mounted high enough above the ground.
- Try adjusting the length of the antenna elements.
- If the SWR is still too high, you may need to replace the antenna or the coaxial cable.
If you are having trouble with your dipole antenna, there are a few things you can do to troubleshoot the problem. First, check that the antenna is properly assembled. Second, make sure the antenna is mounted at a height of at least 1/4 wavelength above the ground. Third, try adjusting the length of the antenna elements. If the SWR is still too high, you may need to replace the antenna or the coaxial cable.
11
Conclusion

- A dipole antenna is a simple and effective way to get started with ham radio.
- With a little care and attention to detail, you can build your own dipole antenna for a fraction of the cost of a commercial antenna.
- And once you have your antenna up and running, you’ll be able to enjoy the world of ham radio communication.
In this post, we have, in simple words, covered how to build a 20 meter ham radio dipole antenna. We have discussed the materials needed, the steps involved in construction, and the formulas for calculating the length of the antenna elements. We have also discussed how to test and troubleshoot the antenna.
Enjoy in dipoles DIY!